
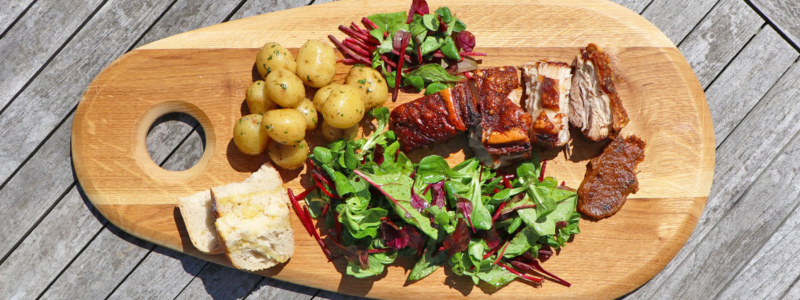
I spent three years making pork belly that looked great in photos but ate like shoe leather. The crackling would come out chewy, or the meat would be dry, or the fat layer would be this unrendered white slab that nobody wanted to eat. I tried every trick I found online — scoring in different patterns, pouring boiling water over the skin, rubbing with vinegar, even blow-drying the skin with a hair dryer. Some of it helped. Most of it was a waste of time.
Then I spent a weekend testing six different cooking methods side by side. Same cut of pork, same oven, same seasoning. The results were not subtle. One method produced crackling that shattered like glass and meat that pulled apart with a fork. Another method produced something you’d be embarrassed to serve to guests. This recipe is what I settled on after that weekend, and I haven’t changed it in four years.
Why Most Pork Belly Recipes Fail (And How This One Fixes It)
Here’s the thing nobody tells you: pork belly is two completely different dishes stacked on top of each other. The top layer (skin and fat) needs intense dry heat to render and crisp. The bottom layer (lean meat) needs low, moist heat to break down collagen without drying out. Most recipes treat the whole slab like it’s one thing, and that’s why they fail.
The standard approach — roast at 350°F for an hour and a half — gives you meat that’s either dry or tough, and crackling that’s more like leather than glass. You need two distinct temperature phases, and you need to get the moisture balance exactly right.
The Two-Phase Method
Phase 1: Low and slow at 275°F (135°C) for 3 hours. This renders the fat cap slowly and breaks down connective tissue in the meat. The internal temperature needs to hit about 185°F (85°C) for the collagen to convert to gelatin. At this stage, the skin will look pale and rubbery. That’s fine.
Phase 2: High heat at 475°F (245°C) for 30-40 minutes. This is where the crackling happens. The skin needs to reach at least 300°F (150°C) surface temperature for the bubbles to form and set. If you skip the low phase and go straight to high heat, the fat hasn’t rendered enough and the skin will burn before the meat is done.
The Salt Trick That Actually Works
Dry the skin with paper towels. Really dry it. Then rub the skin with a generous layer of fine salt — about 1 tablespoon per pound of belly. Let it sit uncovered in the fridge for at least 4 hours, ideally overnight. The salt draws moisture out of the skin, and the airflow dries it further. Before roasting, brush off the salt and pat dry again.
I tried the vinegar method, the baking soda method, and the boiling water method. The overnight salt dry-brine was the only one that consistently produced glass-like crackling across different cuts of pork. It’s not faster, but it’s more reliable.
The Apple Sauce: Why Store-Bought Won’t Cut It
I’m not a snob about shortcuts. I use jarred pasta sauce and pre-shredded cheese on weeknights. But apple sauce for pork belly is not the place to cut corners. The acidity and sweetness need to be in balance, and most commercial apple sauces are either cloyingly sweet or have that metallic tin taste. Plus, homemade takes 15 minutes and costs less than the jarred stuff.
Good apple sauce cuts through the richness of the pork fat. Bad apple sauce just adds sugar on top of fat. The difference is night and day.
How to Make Proper Apple Sauce
Use Bramley apples if you can find them. They break down into a fluffy puree without needing to add much sugar. In the US, Granny Smith apples are the closest substitute. You need about 3 large apples per pound of pork belly.
- Peel, core, and chop the apples into 1-inch chunks.
- Put them in a saucepan with 2 tablespoons of water and 1 tablespoon of lemon juice.
- Add 1 cinnamon stick and 1 tablespoon of brown sugar — no more. The apples should provide most of the sweetness.
- Cook on medium-low heat for 12-15 minutes, stirring occasionally, until the apples collapse.
- Remove the cinnamon stick and mash with a fork. Leave it chunky — smooth apple sauce is for babies, not for pork belly.
Let it cool to room temperature before serving. The sauce will thicken as it sits. If it’s too tart, add a teaspoon of honey. If it’s too sweet, add a squeeze of lemon. Taste and adjust.
Step-by-Step: The Full Recipe
This is the exact method I use every time. No deviations, no shortcuts. It takes about 4 hours total, but only 20 minutes of active work. The oven does the rest.
Ingredients
- 2 lbs (900g) pork belly, skin on, bone removed
- 1 tablespoon fine salt for the skin
- 1 teaspoon kosher salt for the meat side
- 1 teaspoon white pepper
- 1 teaspoon fennel seeds, crushed
- 3 large Bramley or Granny Smith apples
- 1 cinnamon stick
- 1 tablespoon brown sugar
- 2 tablespoons water
- 1 tablespoon lemon juice
Method
- Day before (or 4 hours before cooking): Score the skin in a diamond pattern with a sharp knife. Cut through the skin but not into the meat. Dry the skin with paper towels. Rub the fine salt into the scored skin. Place the pork belly on a wire rack over a baking tray, uncovered, in the fridge.
- 2 hours before cooking: Take the pork out of the fridge. Brush off the salt. Pat the skin dry again. Leave it at room temperature for 1 hour.
- 1 hour before cooking: Preheat the oven to 275°F (135°C). Rub the meat side (not the skin) with kosher salt, white pepper, and crushed fennel seeds.
- Roast phase 1: Place the pork belly on a wire rack in a roasting pan. Add 1 cup of water to the bottom of the pan — don’t let it touch the skin. Roast at 275°F for 3 hours.
- Roast phase 2: Remove the pork from the oven. Discard the water from the pan. Increase the oven temperature to 475°F (245°C). Return the pork to the oven, uncovered, for 30-40 minutes. Watch it closely after 30 minutes — ovens vary and you don’t want burnt skin.
- Rest: Let the pork rest on a cutting board for 15 minutes. Do not cover it or the crackling will soften.
- Make the sauce: While the pork rests, make the apple sauce following the method above.
- Serve: Slice the pork belly into 1-inch thick pieces. Serve with a generous spoonful of apple sauce on the side.
Common Mistakes That Ruin Pork Belly
I’ve made every one of these. Here’s what to avoid.
Not Drying the Skin Enough
Moisture is the enemy of crackling. If the skin is even slightly damp when it hits the high heat, it will steam instead of crisping. The overnight salt dry-brine fixes this, but if you’re skipping that step, you need to pat the skin dry every hour for at least 3 hours before roasting. I’ve tried the paper towel method five minutes before cooking — it doesn’t work.
Using the Wrong Cut
Pork belly comes in two basic shapes: thick and thin. The thick cut (about 2 inches of meat) is ideal for slow roasting because it has enough mass to stay moist during the long cooking time. The thin cut (1 inch or less) is better for stir-fry or quick pan-frying. If you use thin cut for this recipe, the meat will be dry by the time the skin crisps. Look for belly that’s at least 1.5 inches thick at the meaty end.
Opening the Oven Too Often
Every time you open the oven door, the temperature drops by 50-100 degrees. During phase 1, this doesn’t matter much. During phase 2, it’s catastrophic. The skin needs sustained high heat to puff up. Opening the door to check progress can turn a promising piece of pork into a failure. Use the oven light and the window. If you don’t have a window, trust the timer.
Not Resting the Meat
I know it’s tempting to slice into it immediately. Don’t. The juices need 15 minutes to redistribute through the meat. If you cut too early, those juices run out onto the cutting board and you’re left with dry meat. The crackling also needs to cool slightly to set — it’s actually crunchier after 15 minutes than it is straight out of the oven.
When This Recipe Doesn’t Work (And What to Do Instead)
This recipe is not universal. Here are three situations where you should use a different approach.
If You Have a Convection Oven
Convection ovens circulate hot air, which dries the skin faster. That sounds good, but it also means the meat dries out faster. If you’re using convection, reduce the phase 1 temperature to 250°F (120°C) and check the meat after 2.5 hours instead of 3. For phase 2, reduce the temperature to 450°F (230°C) and start checking at 25 minutes. Convection ovens are more aggressive — adjust accordingly.
If You’re Cooking for a Crowd
This recipe works for up to 4 lbs of pork belly. Beyond that, the thermal mass becomes too large and the center won’t cook evenly. For larger quantities, cook two separate pieces on two racks. Rotate them top-to-bottom halfway through phase 1. Do not try to scale up the single piece — it will fail.
If You Want a Faster Version
This is not a quick recipe. If you need pork belly in under 2 hours, skip the slow roast and use the pressure cooker method. Cut the belly into 2-inch cubes, pressure cook at high pressure for 45 minutes with 1 cup of chicken stock, then pat the cubes dry and pan-fry them skin-side down in a hot skillet until crispy. It’s not the same — the texture is different and you lose the large slice presentation — but it’s good in a different way and takes 90 minutes total.
How to Store and Reheat Leftovers
If you have leftovers (unlikely, but possible), here’s how to keep them good.
| Storage Method | Duration | Best Reheat Method |
|---|---|---|
| Fridge, uncovered on a wire rack | Up to 3 days | Air fryer at 375°F for 5 minutes |
| Fridge, wrapped in foil | Up to 3 days | Oven at 350°F for 10 minutes, then broil for 2 minutes |
| Freezer, vacuum sealed | Up to 3 months | Thaw overnight in fridge, then air fryer at 375°F for 6 minutes |
| Freezer, wrapped in plastic + foil | Up to 1 month | Same as above, but add 2 minutes |
Do not microwave pork belly. The microwave turns crackling into rubber in about 15 seconds. If you don’t have an air fryer or oven, slice the cold pork belly thin and pan-fry it in a hot skillet for 2 minutes per side. It won’t be as crispy as fresh, but it’ll be edible.
The apple sauce freezes well for up to 6 months in a sealed container. Thaw in the fridge overnight and stir before serving. It might separate slightly — just whisk it back together.
That weekend I tested six methods, the winner was this one. The crackling shattered when I bit into it. The meat was soft enough to cut with a fork. The apple sauce cut through the richness exactly the way it should. I served it to friends who had never liked pork belly before, and they asked for seconds. I’ve been making it the same way ever since.
Medical Disclaimer: This content is for informational purposes only and does not constitute medical advice. Always consult a qualified healthcare professional before making health-related decisions.